How to Draw Your Favorite Video Game Characters
Drawing video game characters does not have to be that difficult and its a lot of fun.
Here is what you will need:
- A good reference image
- Ruler (for drawing a grid)
- Pencil (if you have art pencils, even better)
- Eraser (for cleaning up the grid and lifting highlights)
- Blank piece of paper (the size you want for your drawing)
Step 1: Create a Grid on Your Reference Image
Draw a grid on your reference image using a ruler. This grid will break the image down into smaller sections, which makes it easier to maintain proportional accuracy. You can make the squares as large or small as you want—1/2-inch squares work well for most projects.
Another option is to use free image editing software, like GIMP, to place a grid on your reference image.
Step 2: Draw a Matching Grid on Your Drawing Paper
Now, you’ll draw the same grid on your blank piece of paper. The key is to match the proportions of your reference image as closely as possible.
Use the same number of squares as you did for the reference grid. If you used a 9 by 14 grid on your reference, use the same size grid on your paper.
Lightly draw the grid on your paper using a pencil. Don’t press too hard so the lines are easy to erase later.
Step 3: Transfer the Drawing Using the Grid
Now, the grid is your guide to accurately transferring the game character to your drawing paper. You don’t need to follow any specific order—just go square by square.
Look at each square on your reference and draw what you see inside the matching square on your paper. Treat each square as a series of basic shapes.
Focus on proportion: The grid helps you maintain correct proportions by showing you exactly where each part of the character should go.
Step 4: Erase the Grid and Refine the Line Drawing
Once you’ve completed the line drawing, it’s time to erase the grid.
Carefully erase the grid lines you drew on your paper. Use a soft eraser so you don’t smudge your drawing.
Refine your outline: Go over the pencil lines you’ve drawn, cleaning up any rough spots and sharpening the details. You should now have a nice, clear outline of your game character.
Step 5: Begin Shading
Shading is where your drawing starts to come to life.
Decide on the light source: Figure out where the light is coming from in your reference image. This will help you know where to add darker and lighter areas.
Shade lightly at first: Go over shadowy areas again to make them darker.
Blend the shading: After shading, use a blending stump or your finger to gently blend the pencil marks. This helps smooth out the shading and creates a more natural, three-dimensional effect.
Step 6: Add Highlights
To make your drawing stand out, you’ll add some highlights to give it even more depth.
Lift highlights with an eraser: Gently use your eraser to lift out small areas of highlight.
Refine your shading: After lifting the highlights, you might want to go back in with your pencil to deepen any areas that need more shadow. Just make sure to blend again for smooth transitions.
Step 7: Final Touches
Take a step back and look at your drawing. Make any last-minute adjustments to the shading or details, and clean up any lines that might still need refining.
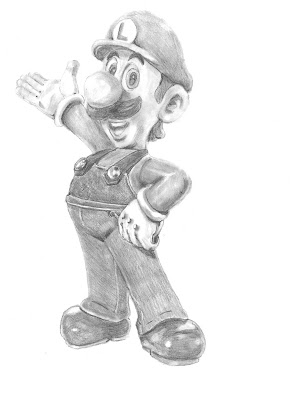
Here is a look at my attempt.
I can see where I need a little more practice. There are still some hard lines that need a little more blending. But as you can see, even with little art experience, this technique can produce satisfying results.
Thank you for reading. I hope you have enjoyed this tutorial and maybe you would be kind enough to respond with some links to your own artwork. I would love to see it.


Comments
Post a Comment